Saturday, August 21, 2010

Peanut Butter & Banana Sandwich... Sort of...


My nephew, Drew, recently turned 18-years-old.  When I asked him what he wanted for his birthday, he responded, "A peanut butter sandwich."  Attempts to prompt him into giving me a real answer were futile.

I realized that I was just going to have to give him money for his birthday.  However, I really like to be creative with my gifts, so I decided to make a peanut butter sandwich out of art foam.  Initially, I thought I would make the peanut butter out of cardstock and put a check in to represent jelly.  This didn't suit my vision of a peanut butter sandwich, as the nothing but the "bread" had any real substance.  I decided to see if I could find a peanut butter-colored clay.  I found Pluffy, a clay that can be shaped and baked in the oven, which preserves the shape of your design.  They had a wide assortment of colors and, fortunately, there was one that was very close to peanut butter.  I found some light yellow cardstock that was the color of banana slices.  This was the perfect solution to my dilemna, as banana slices would be a great disguise for $1 gold coins.

I bought one sheet of white art foam, two pieces of light yellow cardstock, and one package of Pluffy clay.  I fished twenty-five $1 coins from one of my banks and dragged out the Cricut Expression machine for the very first time. I took my X-acto Knife and carefully cut one "slice of bread" from the art foam, then took that piece and used it as a guide to cut a second "slice".

 A brown Sharpy was used to color the edges of the "bread".  Next, I molded the Pluffy clay to the shape that I wanted to best resemble peanut butter spread. The Pluffy is baked at 275 degrees for 15 minutes. 


After the clay had cooled, I placed it on the "bread" and set out to make the "banana slices".  After watching the Cricut DVD and doing a bit of trial and error, I cut 50 1-1/4" circles out of the yellow cardstock.  I took a black Sharpy and added dots and lines to imitate the seeds and natural markings of bananas.  


 Double-sided adhesive was placed on the unmarked sides of each "banana slice".  A $1 coin was secured to one circle and a second circle was pressed onto the coin.  The edges of the cardstock circles were slightly depressed.


The "sandwich" was now ready to assemble.  

When my nephew opened his "lunch", he said, "Ha!  That's funny!"  He later told me the gift was "awesome", which made all the work worthwhile and was why I wanted a more creative way of giving him cash than just writing a check, anyway.  


Wednesday, July 21, 2010

Creamy Horseradish Sauce


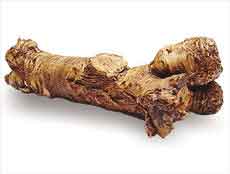
Okay, if you have never seen real horseradish root, let's just say it's rather... ummm...phallic... and this is one of the "nicer" specimens.  Some of them are downright nasty-looking.  
Anyway...  My husband asked me to buy some horseradish root to make some real, homemade horseradish sauce.  Unfortunately, the first recipe he picked out was not meant to be made with raw horseradish, but with a prepared sauce.  Once I told him that, he picked out a second recipe.  This one was little more than pureed horseradish root with a touch of salt, sugar, and vinegar.  It was not spreadable by any means, and was fairly disgusting.  The horseradish smell was overpowering!  My eyes watered and my nose ran if I stood too close to the food processor!
 

Since that recipe obviously wasn't what my husband wanted either, we found another recipe.  This one added a cup of heavy cream, more vinegar, half of a pureed turnip, and assorted spices. 


The sauce was creamier, but the turnip and cream cut down the sharp, hot taste of the horseradish and made it too mild.  He likes it HOT!  I added more pureed horseradish to the mix, but he said it still was not hot enough and refused to eat it. {{sigh}}

I wasn't going to let it go to waste, as I had invested a minimum of two hours on this project, when I had been looking forward to a relaxing evening.  I ladled the sauce into recycled jars and labeled them.  (Okay, not beautiful labels, but maybe when I actually hook up and figure out my Cricut Expression, I can do better.)


I cleaned up the approximately 647 kitchen utensils and counters that had been used (or splattered on) in the preparation of the now unwanted horseradish sauce.  Finally, I posted a note on Facebook offering the horseradish sauce to friends.  Thankfully, three of my friends were brave and adventurous souls who took me up on the offer of free "horsey" sauce.  I am happy to announce that all three have gotten back to me and said they really liked it.  One even said, "That homemade horseradish was so good that my mom and I have been eating it with spoons!!!!" (emphasis hers - Thanks, Lisa!)   

So at this point, three out of three guinea pigs prefer my homemade horseradish sauce over no horseradish sauce at all! 

Wednesday, July 7, 2010

Steven King's "IT" Birthday Cake

A friend of mine asked me to make his son's birthday cake. He didn't have anything particular in mind, only that it reflect something having to do with one or more of Steven King's books. The first (and really, only) thing I could think of was Tim Curry's version of Pennywise, the clown from the television mini-series, "IT" (1990). That was one scary clown!

Now before anyone complains that this is more "cakewreck" than anything else, let me just say that: 1) this was the first time I have ever sculpted candy clay; and 2) I was injured in a traffic accident a few days before, and was working basically one-handed.  Also, I'm just an amateur, and I don't claim to be a world-class decorator, although I wish I was.  (I wasn't in a sling at the time I made the cake, but my left arm was pretty useless.)       ...and yes, I realize my shirt and camera match my shower curtain... sheer coincidence...
Anyway, here is the cake.  The angle isn't the best to show the clown, as it gives the appearance of having an elongated chin and you can't really see the creases in the face, etc.  The cake is not exactly as I had envisioned, but I think it turned out pretty well, all things considered.    This is a Red Velvet cake with Pure Buttercream Frosting "grass", a fondant "sidewalk", a candy clay "Pennywise" clown, fondant clown fingers, and giant jawbreaker "balloons".  I used a Sugar Craft gun to make Pennywise's hair, and used clay tools to sculpt the face and teeth, which were implanted in the mouth.  A Wilton Icing Writer pen was used to give the appearance of sidewalk chalk.  I had intended to dust the writing with different colored luster dust, but my friend came to pick up the cake before I could do that.  He liked it "as is", so I left it alone.  

The feedback was positive and I understand my friend's son was very happy with the cake.  They said he wanted to freeze the clown and keep it forever, and he talked about the cake for several days.  That's the ultimate compliment!


Sunday, June 13, 2010

Guest Post - Matt from Tiepedia on "The Tie Cake"

In honor of having reached over 1,000 hits to the blog (which were admittedly, probably mostly me), I have a guest blogger today!  Meet Matt from "Tiepedia", http://www.tiepedia.com:

Matt2

I read his blog and enjoyed it.  He graciously allowed me to borrow his post in honor of Fathers' Day.  Please read it for yourself and drop by Matt's blog when you get a chance.  He would appreciate it.  Thanks again, Matt!

Not Your Ordinary Father's Day Ties


It may surprise some of you to hear what I am about to say, but it must be said. Not all guys want a tie on Father's Day. GASP! I know, I know, it sounds crazy... and I certainly am not one of those guys, but apparently it's true.

Listen to what Joseph Hurtado has to say, "there are only two types of men: those who hate ties, and those who grudgingly accept them as part of the job."

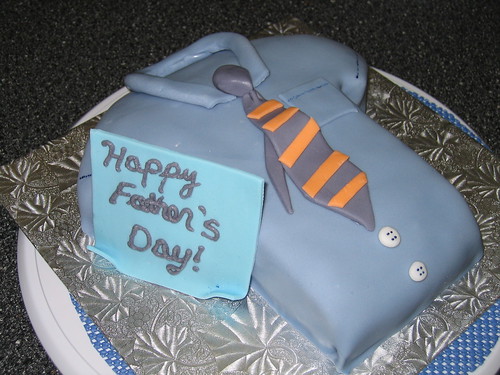
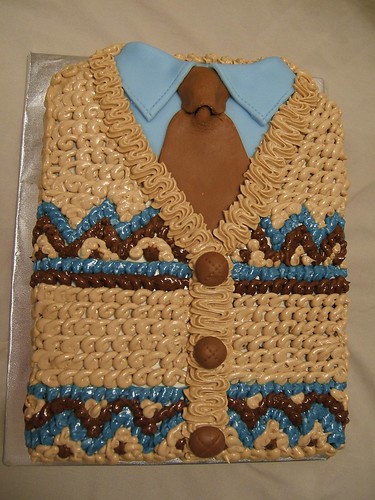
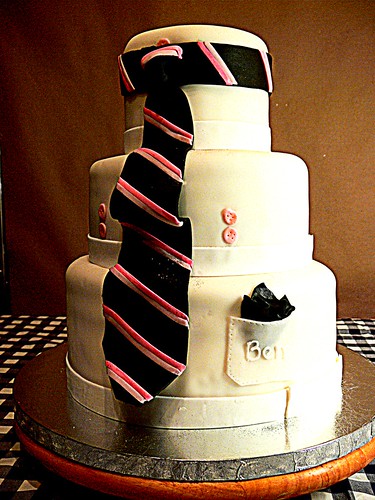
Blasphemy as far as I am concerned, but if you're Mrs. Hurtado you may want to think twice about getting Joseph a tie for Father's Day. How about baking him a delicious necktie cake instead? I don't think many men could resist that. Here are some sweet examples for you to consider! (Congrats to the cake artists who created these!)


tiecake1
Original Source Here


tiecake2
Original Source Here


tiecake921
Original Source Here


tie-cake-4342
Original Source Here


tiecake3
Original Source Here


tiecake4
Original Source Here


tiecake5
Original Source Here


tiecake6
Original Source Here


tiecake7
Original Source Here


tiecake9
Original Source Here


tiecake10
Original Source Here


tiecake11
Original Source Here


tiecake12
Original Source Here


tiecake13
Original Source Here


tiecake9123
Original Source Here


tiecake14


facebooktwitterredditstumbleupondelicious


About The Author: Matt’s longest streak of consecutively wearing a tie is 2 years and 5 days! (Don't worry they were different ties) He loves life, his family, his heaven, and his sports (golf, basketball and college football).

Monday, June 7, 2010

"Caja China" Pig Roast

DISCLAIMER/WARNING:  THIS POST CONTAINS PHOTOS OF A WHOLE PIG BEING ROASTED.  IF YOU ARE SQUEAMISH, YOU SHOULD PROBABLY STOP READING NOW!

My husband decided that he wanted to roast a whole pig.  I don't know why.  He ordered the special "Caja China" - or Cuban roasting box - online.  Then he ordered a "suckling" pig from a local butcher shop.  For some reason, I thought a "suckling" pig would be about 15 pounds and 24 inches long, like the piglets I had seen on farms when I was young.  This bad boy was 53 pounds and about 4 feet long!  He barely fit into the box. 

The pig was already dressed (i.e. gutted and castrated) when we bought it from the butcher.  We had to press it between the grates and hook them together to flatten out the pig.  I believe this had something to do with ensuring that it cooked at an even rate.
Then the pig was placed inside the box and a pan-like top was put on, followed by a grate.  Charcoal was added on top.  We started getting everything ready around 4:30 pm and the cooking actually began at approximately 5:00 pm. 
 
(We started out in the back yard, but had to move to the front of the house because of the wind.) 


We had to scrape off the ash about once an hour, and rake the remaining coals and fresh charcoal to make sure it was spread out evenly.  We had to add approximately 10 pounds of charcoal every hour.  (We used Kingsford.)


Slits had to be cut into the skin to prevent it from busting open toward the end of the cooking process. 


Approximately 1:00 am:  After about 8 hours, the pig turned out very crispy and "fall-off-the-bone" tender.                                     
               The obligatory "apple" shot. 


EEEEEEEEK!  This is the stuff of nightmares!!

Wednesday, June 2, 2010

Bananas Foster Redux

I used the same Bananas Foster cupcake recipe to make these star cupcakes for the graduation party of my niece and two nephews.  (Congratulations to Jordan on her Bachelor of Arts from Oklahoma Baptist University, Drew on his diploma from Choctaw High School, and Garrett on his Masters Degree from Texas State University!)  The star shape fit in nicely with the star theme of the party.

I used the Wilton silicone star cupcake pan for these and was not at all pleased with it.  I found that I had to experiment with the baking time and ultimately had to increase the cooking time by about half (34 minutes, instead of 24), plus I could only cook six cupcakes at a time.  To make 45 cupcakes, it took me almost half the night.  They were cute, but just not worth the effort for me.  I will be giving this pan to my niece, who loves stars of all kinds.